General:
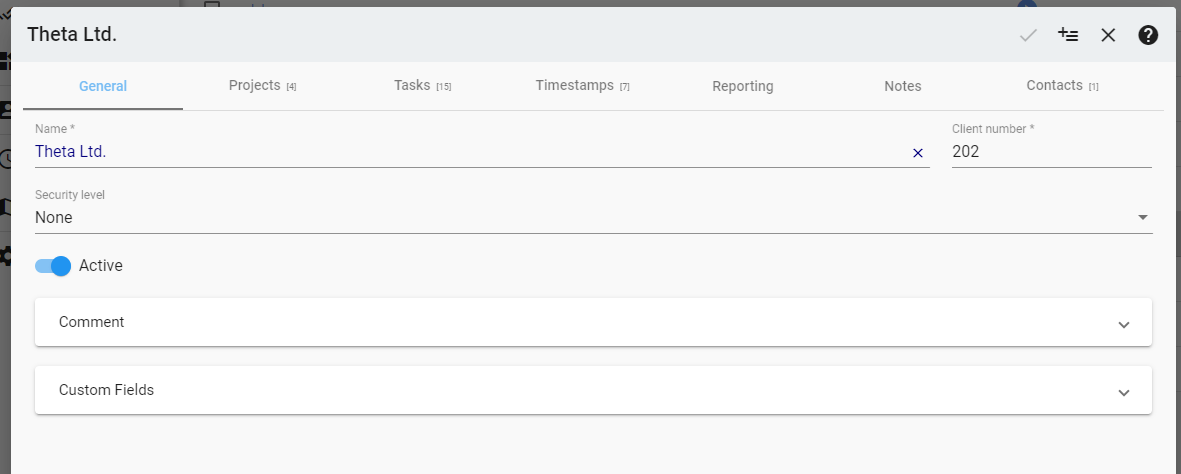
The name of the customer is mandatory to create projects and tasks to the customer. Of course, you can name the customer as you like. If you do not want to use a name for privacy reasons, you can use numbers or a fictitious name instead.
The customer number must be a number. Letters are not allowed at this point.
Security levels control the visibility within the Xpert-Timer system. An employee with for example medium security level only sees customers who have the same or a lower security level. The customer "Eta GmbH" and its projects (see screenshot) for example: An employee with medium security level would not see it in his customer list.
Only an active customer is visible with his projects in your customer and project management. If you set the customer "Inactive", you will only see this customer if you set the filter to "Inactive" customers in the customer management.
You can leave a comment for each customer. So you can for example indicate special circumstances.
Customized fields created in XT Pro are also visible on the web interface. However, you can not edit the fields in XTWeb. This must happen from the Xpert-Timer Pro.
The description of this chapter is based on the expanded view.
Projects
In the tab "projects" you can see all projects that have been created for the corresponding customer.
The checkboxes in front of the project name are for marking. This marks for example, which projects you want to delete.
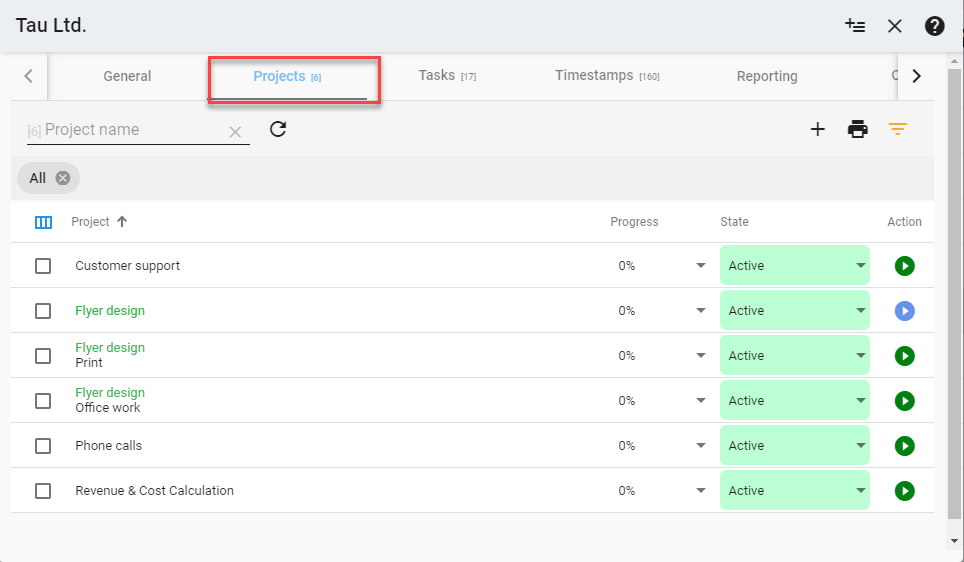
Clicking on a project opens a menu from which you can start the project, create an addendum, create a subproject or a task. You use the reporting menu item to switch to cross-client and cross-project reporting and thus transfer the filter to the customer and the project. Delete will delete the project.

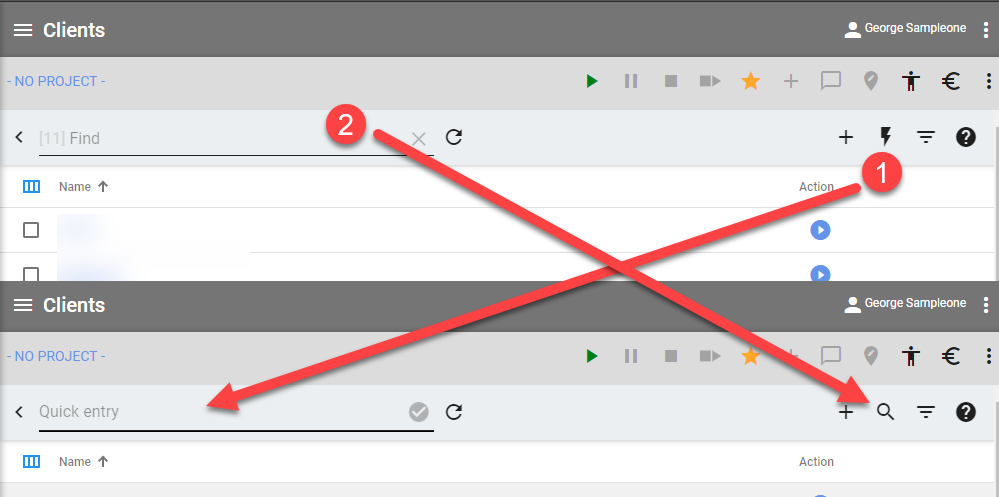
Fast entry and search
In the entire customer data record you have a toolbar available. In the "Projects" area, you can create a new project here via (1). Use (2) to toggle between fast entry and search. With fast entry, you can simply type in a new project name in the field and save it directly. Without intermediate dialog. Tap the flash to switch to fast entry and the magnifying glass to see the search box.
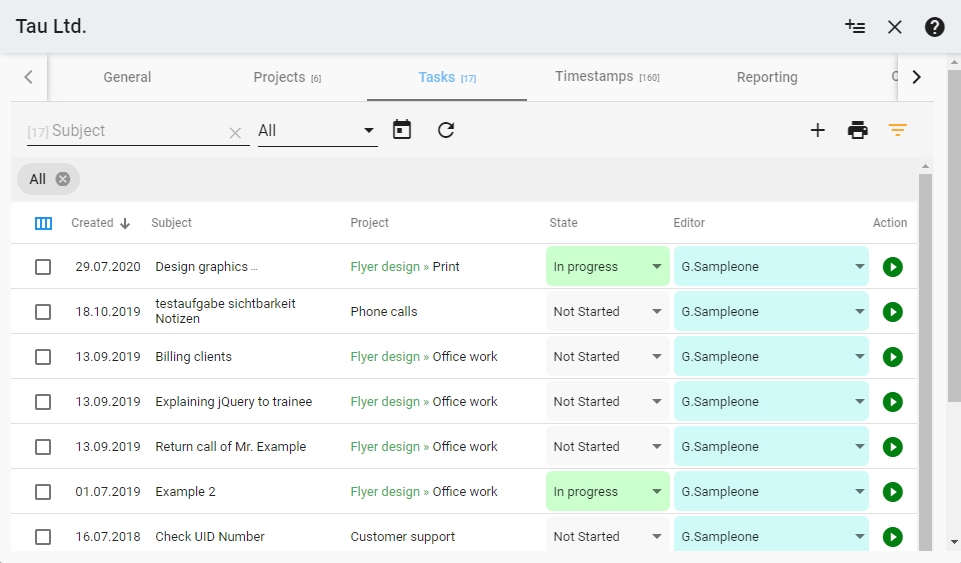
Tasks
The task list shows you all the tasks of the customer, independent of the project. Here you can do the tasks via the status. The checkboxes in front of the task names serve to mark and delete the tasks.
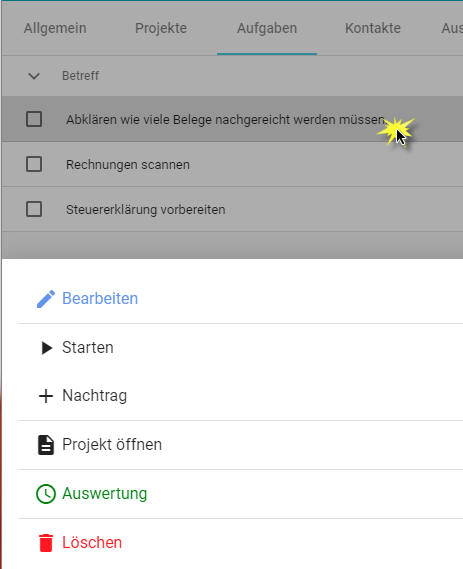
Clicking on a task returns you to the familiar menu with the options to start the task, create an addendum to the task, open the project belonging to the task or reporting the task.
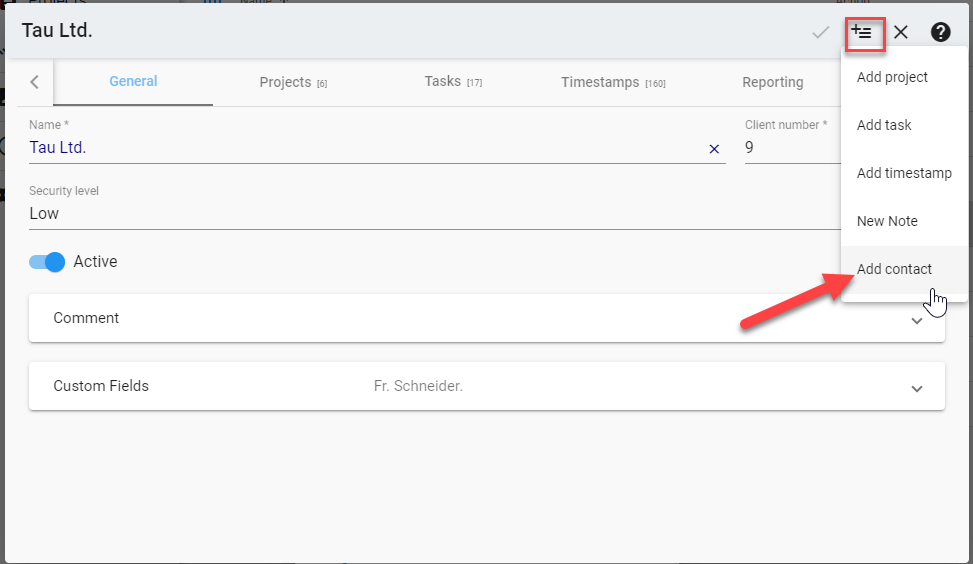
Contacts
You can add unlimited contacts to a customer. This facilitates the recording of multiple contact persons.
Create new contacts in the toolbar via the plus. A detailed description of how to enter a new contact can be found in the chapter "Contact information".
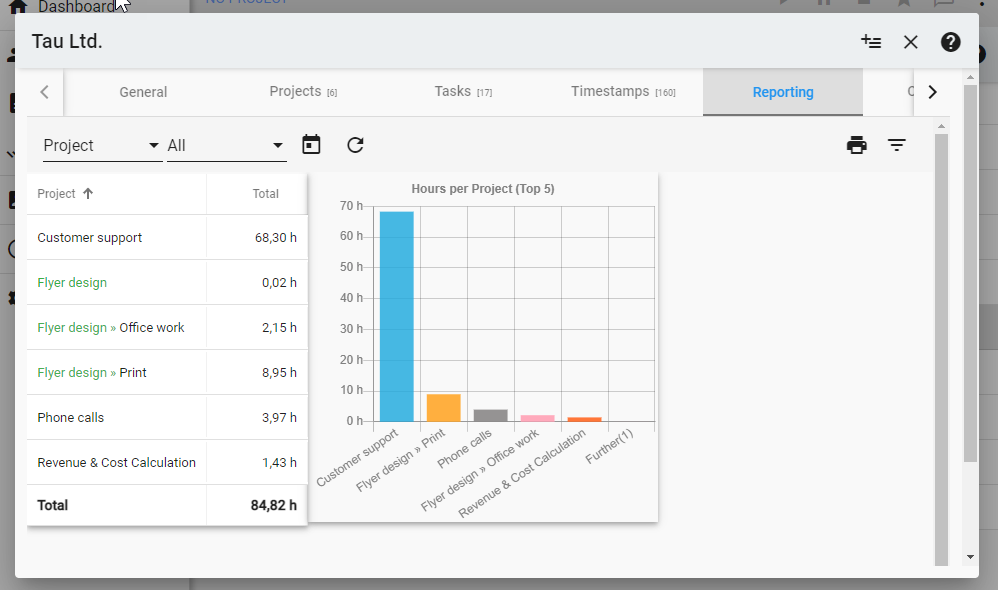
Reporting
In the area reporting in the customer management you see a list of all projects of the customer on which times were booked. The project times are summed over the entire period. If you need filters to display specific projects or periods, please use the cross-customer and cross-project Reporting.